
We're Having an "Open House" and You're Invited!

Although we are not yet finished with all the renovation projects, we have decided to host an "Open House" next Saturday - in order to meet all of our new neighbors. Heck, we may not be done for another year and didn't want to put off meeting people in our new community.

The first step was to decide on how to invite everyone. I decided to create a photo collage invitation; save it as a jpg; and, have 4 X 6 photo prints printed at Walgreen's for 10 cents each. (We will be hand delivering these to all 500 and something homes in the park.) Phew - Not looking forward to that!

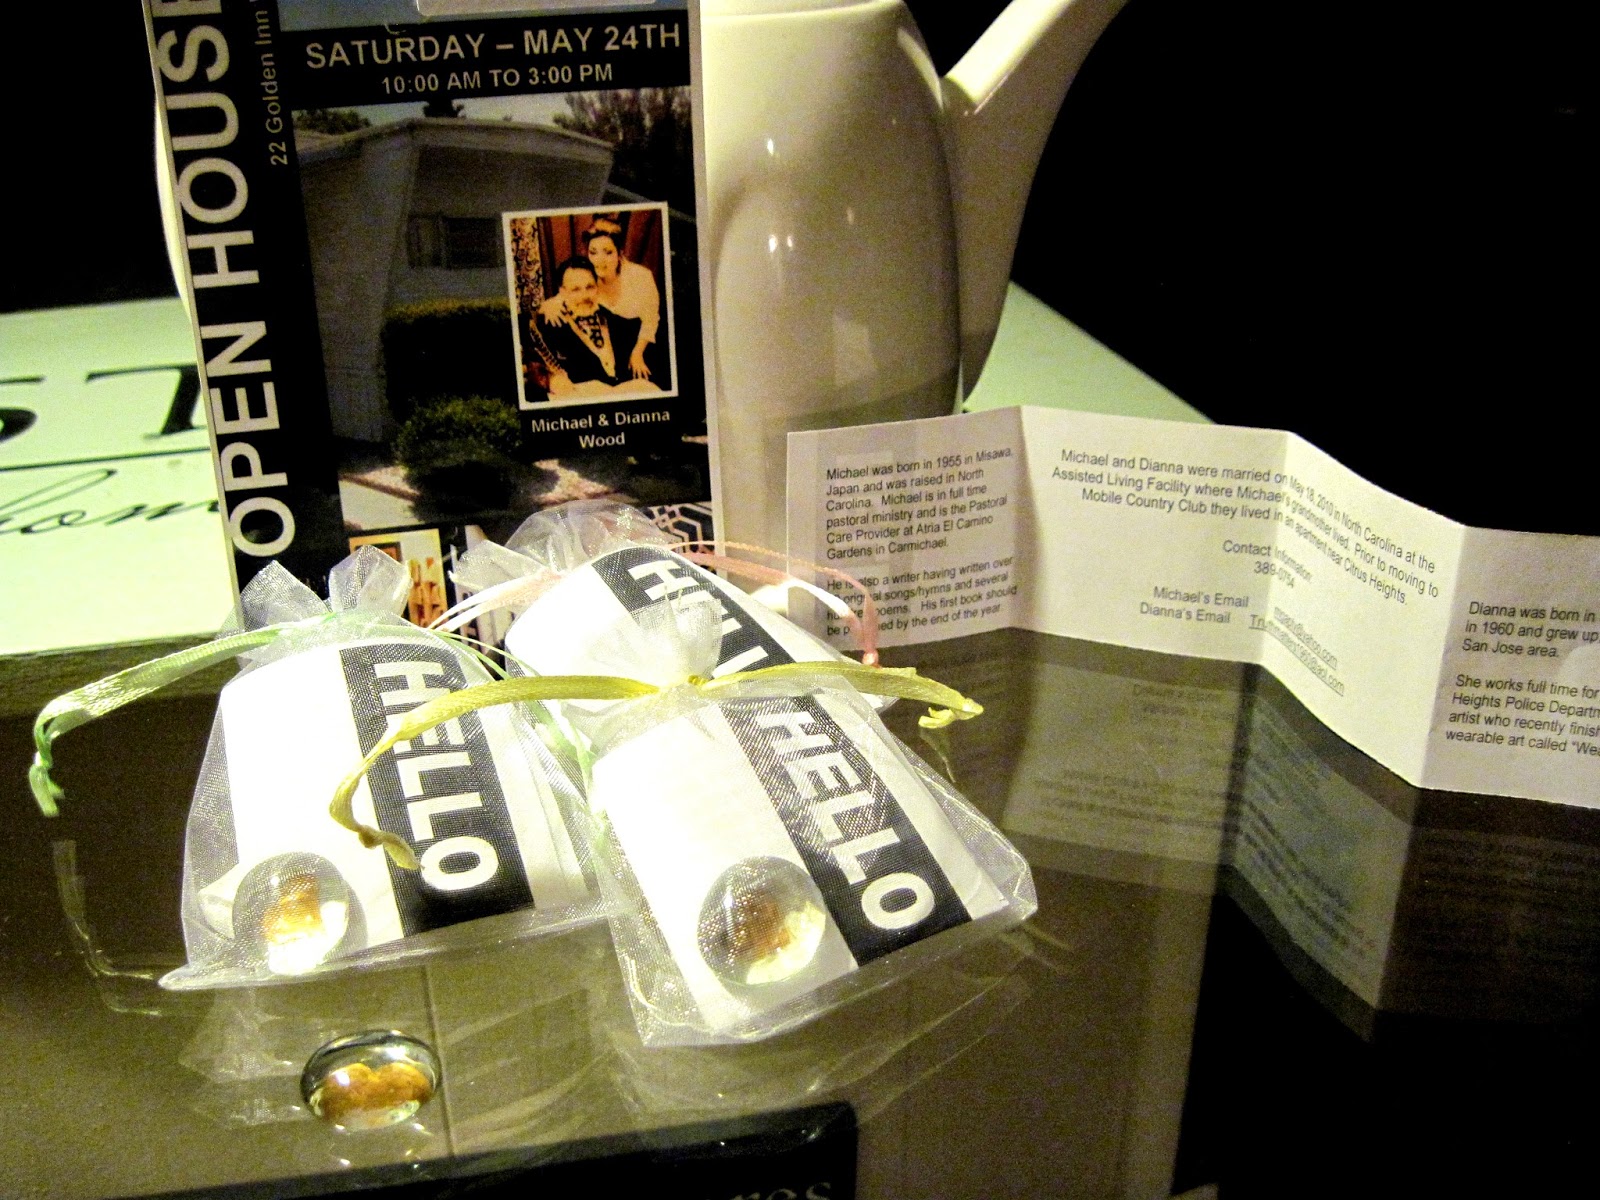
I also really wanted to have something for all the guests who might pop in to meet us and tour our little home to take home with them, so step two was created little favors. I found little organza bags (meant for baby shower favors) at the Dollar Tree - (6 bags for a dollar) and filled them with:

1. A brief bio for both me and Michael with our contact information and our blog addresses that I typeset in a WORD document; cut into 2 inch by 8 inch strips and folded into a little square. I wanted the cover to match the interior design of our house. So I placed a bold "Hello" on the right hand corner of the strip.

2. A little glass accent gem (which come 50 in a bag at the Dollar Tree) which I embellished with a little gold heart. I used a Sharpie Bronze metalic marker to draw the little heart on the flat side of the glass gem.
and of course candy

3. I purchased both "Graffiti" Taffy and individually wrapped chocolate gourmet ments and included one of each in each little bag.

If you want to tackle something like this - get a few friends to help draw gold hearts on the glass gems and to help fold all your little square "hello's".

I will be placing these little favors in a butterfly net near the front porch for guests to grab on their way out. You can use this concept to write anything you want inside the little square note - truly a one-of-a-kind party favor - This would be great for a wedding reception, as well.

Here is another look:


I am really pleased with how the little "Open House" favors match the interior feel of the house. Let me know if you have any questions about the supplies or the cute little folded note. Wish you all lived in Sacramento County and could stop by.

Hey - If any of you do--you are more than welcome to pop in - I would love to meet you!


Comments

Popular posts from this blog

Painted Patio Wall Transformation - Our New "Secret Garden"

Michael and I have discovered a Secret Garden every where we have lived since getting married in 2010.  Whether it was the creek that ran behind our first apartment in Sacramento or the tiny little space of our 520 square foot, 1962 single-wide, mobile home in Rancho Cordova, California, we were always able to discover and create a unique sanctuary to call home.  Even though, in years past, we did what we could to make our surroundings uniquely wonderful, we never had the room to go really crazy until now. Since moving to our new home in North Carolina in May, we have not only discovered a world of exotic creatures and plants outdoors, but we have also started taking full advantage of the additional space we now have available to add our own touch of whimsy to the new "Wood's Secret Garden". Our first major project was the Patio which joins the in-law quarters (where mom lives) to the kitchen entrance into the main house.  We have received so many questions abou

The Project!

So, I had a huge jar of left over glass pebbles--you know the kind that you get at the craft store in those little net bags. I use the flawless ones to make my custom art pendants and rather than throw away the flawed ones, I kept collecting them in a large glass jar hoping someday I would come up with a brilliant idea. Well, here it is! It's a work in progress... Clip I first cut out pages from an old pocket Bible that was falling apart and missing pages. Clip I them spent a good part of a day, decoupaging them to a long section of the hallway wall. Clip Once the decoupage had dried; I began at the bottom of the wall, gluing one glass bead at a time, using (you guessed it) E6000. This process took at least 10 separate, 1 hour sessions. Once I glued about 5 or 6 rows, I used lengths of scotch tape to secure them to the wall and allowed the glue to dry over night before starting another section. Clip This took a really, really, l

Custom Doll Trunk with Doll and tons of clothes and accessories now available!

This took forever!  After transforming the 24 inch Bratz Dolls into "Just K.I.D.S" as part of the campaign to help rescue kids trapped in the sex trafficking industry, I got the crazy idea to convert a vintage suitcase into a doll trunk.  After making the inside compartments and decoupaging and hand painting the entire outside of the suitcase (both front and back) the set is now complete and up for auction on Ebay. Leave a comment if you want to bid on this amazing doll trunk.  You even get to pick which doll you want to be included.